Sewing is a rewarding craft, but it comes with its fair share of challenges. Whether you’re a beginner or an experienced sewist, mistakes are bound to happen. The good news? Most sewing mistakes can be easily fixed with a little patience and the right know-how. In this blog post, I’ll walk you through some of the most common sewing errors and provide troubleshooting tips to help you get back on track.
1. Uneven Seams
The Problem: One side of the fabric seems longer than the other, causing puckering or wavy seams.
The Solution: This often happens when you’re not guiding the fabric evenly or if the fabric is shifting. To fix this, use a walking foot or even feed foot, which helps move both layers of fabric through the machine at the same pace. Also, try to keep a light, steady hand on the fabric—avoid pulling or pushing it as it goes through the machine.
2. Skipped Stitches
The Problem: Your machine misses stitches, leaving gaps in the seam.
The Solution: Skipped stitches can occur for several reasons, including a dull needle, incorrect threading, or tension issues. Start by changing the needle—it should be sharp and appropriate for the fabric you’re using. Then, re-thread your machine, making sure the thread is properly seated in the tension discs. If the problem persists, check your machine’s tension settings, adjusting them slightly to see if that helps.
3. Fabric Not Feeding Properly
The Problem: The fabric isn’t moving smoothly through the machine, causing bunching or uneven stitches.
The Solution: This can be due to the feed dogs (the small metal teeth that move the fabric) not engaging properly. First, check that the feed dogs are raised. If they are, but the fabric still isn’t feeding correctly, try cleaning the area around the feed dogs. Lint or thread debris can sometimes get stuck and interfere with the feeding process. Additionally, using a walking foot can help if you’re working with thick or slippery fabrics.
4. Thread Bunching Up
The Problem: You notice a tangled mess of thread (often referred to as “bird’s nest”) under your fabric.
The Solution: This frustrating problem usually stems from incorrect threading or bobbin placement. First, re-thread both the upper thread and the bobbin, making sure the thread passes through all necessary guides. Double-check that the bobbin is correctly inserted and spinning in the right direction. Also, ensure the presser foot is down when you start sewing—this engages the tension discs and helps prevent bunching.
5. Needle Breaking
The Problem: The needle snaps mid-sew, which can be alarming.
The Solution: Needle breakage is often caused by using the wrong type or size of needle for your fabric, sewing over thick seams, or incorrect machine settings. Make sure you’re using the correct needle type (e.g., universal, ballpoint, or denim) and size for your fabric. Slow down when sewing over thick seams, and if your machine allows, raise the presser foot slightly to accommodate the thickness. Always check that your needle is inserted correctly and is not bent.
6. Inconsistent Tension
The Problem: Your stitches are too tight or too loose, causing puckering or loose loops on one side of the fabric.
The Solution: Tension issues can be tricky, but they’re usually solvable. Start by checking the thread path and re-threading your machine, ensuring the thread is seated in the tension discs. If that doesn’t work, adjust the tension dial incrementally, testing on a scrap piece of fabric until you achieve balanced stitches. Remember, different fabrics may require different tension settings, so don’t be afraid to experiment.
7. Seams Coming Apart
The Problem: Your seams are not holding together, either due to weak stitches or fabric fraying.
The Solution: Weak seams often result from too large a stitch length or using the wrong type of stitch. For most fabrics, a straight stitch length of 2.5 to 3mm is ideal. If your fabric is prone to fraying, consider using a zigzag stitch or a serger to finish the edges. Backstitch at the beginning and end of seams to secure them.
8. Fabric Puckering
The Problem: Your fabric gathers or puckers along the seams, giving a wrinkled appearance.
The Solution: Puckering can happen if the tension is too high, the stitch length is too short, or the fabric isn’t stabilized properly. Start by lowering the tension slightly and increasing the stitch length. If you’re working with lightweight or slippery fabric, use a stabilizer or a walking foot to keep the fabric smooth as you sew.
9. Misaligned Pattern Pieces
The Problem: Your fabric pieces don’t line up correctly, leading to uneven seams and mismatched edges.
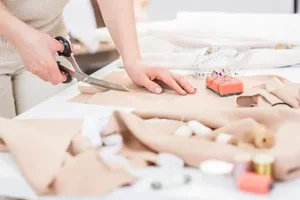
The Solution: Accurate cutting and pinning are crucial for pattern alignment. Ensure your fabric is laid flat and on grain before cutting. Use sharp scissors or a rotary cutter for clean edges. When pinning pieces together, align the notches, and use plenty of pins to keep the layers from shifting. If you’re struggling with matching complex patterns, consider basting the pieces together by hand before sewing on the machine.
10. Sewing Machine Jamming
The Problem: The machine jams, stopping your project in its tracks.
The Solution: A jammed machine can be caused by tangled thread, fabric caught in the feed dogs, or a misaligned bobbin. Turn off the machine, remove the fabric, and carefully cut away any tangled threads. Remove the bobbin and check for any loose threads or debris. Reinsert the bobbin correctly, and re-thread the machine before trying again. Regular maintenance, such as cleaning and oiling, can help prevent jams.
Final Tips
Mistakes happen, but they’re part of the learning process in sewing. When troubleshooting, take your time, and don’t hesitate to consult your machine’s manual. Practice on scrap fabric before moving to your main project, and remember, even experienced sewists encounter challenges. With patience and persistence, you’ll overcome these common issues and continue to improve your skills.
Happy sewing!


