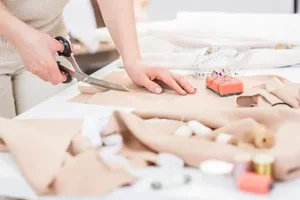
Sewing with leather can be a unique and rewarding experience, but it does require some
special considerations and techniques due to the thickness and toughness of the material. Here are some valuable tips for sewing with leather:
1. Choose the Right Type of Leather:
- Different types of leather have varying thicknesses and characteristics. Start with soft and supple leather, like lambskin or goatskin, for beginner projects. These are easier to work with than thicker, stiffer leathers.
2. Use Appropriate Needles and Thread:
- Invest in heavy-duty sewing machine needles designed for leather or use a leather-specific hand sewing needle if you’re sewing by hand. Use a strong polyester or nylon thread, which is more durable than cotton thread.
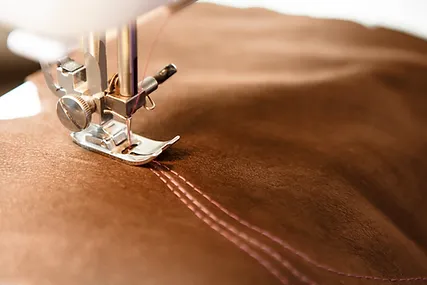
3. Adjust Your Machine Tension:
- Leather is thicker than most fabrics, so you may need to adjust your sewing machine’s tension to accommodate the added thickness. Test on a scrap of leather to find the right tension setting.
4. Use a Walking Foot or Teflon Foot:
- A walking foot or a Teflon foot can help feed the leather evenly through the sewing machine, preventing it from sticking to the presser foot.
5. Reduce Stitch Length:
- Shorten your stitch length to create smaller, tighter stitches. A stitch length of around 2.5 mm works well for most leather sewing.
6. Mark Stitching Lines:
- Use tailor’s chalk, a disappearing ink pen, or specialized leather marking tools to mark your stitching lines accurately. Leather is not forgiving of pinholes or incorrect stitching.
7. Practice on Scrap Leather:
- Before working on your main project, practice sewing on a scrap piece of the same leather to get a feel for the material and your machine’s settings.
8. Use Binder Clips or Clips Instead of Pins:
- Leather can be damaged by pinholes. Instead of pins, use binder clips, wonder clips, or heavy-duty clips to hold your pieces together.
9. Apply Leather Glue or Double-Sided Tape:
- Use leather-specific glue or double-sided tape to hold seams or pieces together before stitching. This helps prevent the leather from shifting during sewing.
10. Hand Baste Curved Seams:
- For curved seams or intricate details, consider hand basting the pieces together before sewing on the machine. This ensures precise alignment.
11. Backstitch at the Beginning and End:
- When sewing with leather, backstitch at the beginning and end of each seam to secure the stitches since knots can be bulky and may not hold well.
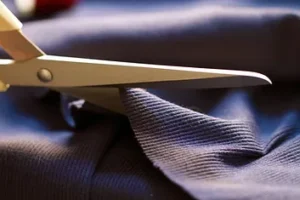
12. Clip Corners and Curves:
- Clip the seam allowances at corners and curves to reduce bulk and allow the leather to lie flat when turned right side out.
13. Finish Edges Neatly:
- To prevent fraying, you can edge your leather pieces with leather edge paint, wax, or special sealants.
14. Sew Slowly and Steadily:
- Leather can be tough to sew through, so take your time and sew slowly to maintain control and achieve even stitching.
15. Maintain Your Machine:
- Leather sewing can put extra strain on your sewing machine, so make sure it’s in good working condition. Clean and oil it regularly to prevent excessive wear.
16. Protect Your Hands and Eyes:
- Leather can be abrasive and may produce fine dust particles when cut and sewn. Wear gloves and safety glasses to protect your hands and eyes.
Sewing with leather may require a bit of practice and patience, but with the right techniques and tools, you can create beautiful leather projects that are durable and stylish. Start with small, manageable projects and gradually work your way up to more complex leatherwork as you become more comfortable with the material.